Managing your VPS or dedicated server can feel daunting, but with the right tools, it becomes significantly simpler. Vesta Control Panel (Vesta CP) is a popular, free, and open-source hosting control panel that provides an intuitive web interface for managing various aspects of your server. This guide will walk you through the complete Vesta CP installation process, making it easy for both beginners and experienced users to get started.
(Keywords: Vesta CP, install Vesta CP, Vesta control panel, server management, VPS control panel, dedicated server control panel, free hosting control panel)
Why Choose Vesta CP?
Before we dive into the installation, let’s briefly touch upon why Vesta CP is a fantastic choice for your server management needs:
- Free and Open Source: Enjoy powerful features without any licensing costs.
- User-Friendly Interface: Its clean and straightforward design makes navigation a breeze.
- Lightweight and Fast: Vesta CP is known for its minimal resource consumption, ensuring optimal server performance.
- Comprehensive Features: Manage websites, databases, email accounts, DNS, FTP, and more, all from a single interface.
- Growing Community: Benefit from community support and readily available resources.
(Keywords: free control panel, open source control panel, lightweight control panel, Vesta CP features)
Prerequisites for Vesta CP Installation
Before you begin the Vesta CP installation, ensure you have the following:
- A Clean Supported Linux OS: For a smooth installation and to avoid conflicts, it’s best to use a fresh installation of one of the supported distributions: CentOS (5-8), Debian (6-10), or Ubuntu (12.04-20.04).
- Root Access via SSH: You’ll need the ability to connect to your server as the root user using an SSH client.
- Sufficient Server Resources: While lightweight, ensure your server has at least 512MB of RAM (1GB recommended) and adequate disk space for your future needs.
- A Configured Hostname: Make sure your server has a properly set hostname. You can check this with
hostname -f. If not set, configure it before proceeding.
(Keywords: Vesta CP requirements, Linux server, root access, server hostname)
Step-by-Step Guide to Installing Vesta CP
Follow these steps carefully to install Vesta CP on your server:
Step 1: Connect to Your Server via SSH
Open your SSH client and connect to your server using your server’s IP address and the root user credentials:
Bash
ssh root@your_server_ip
Step 2: Download the Vesta CP Installation Script
Use the curl command to download the official Vesta CP installation script:
Bash
curl -O http://vestacp.com/pub/vst-install.sh
(Keywords: download Vesta CP script)
Step 3: Verify the Installation Script (Recommended)
For security, it’s always wise to inspect the script before running it. Use a text editor like less:
Bash
less vst-install.sh
Review the contents and press q to exit.
Step 4: Make the Script Executable
Grant the script execute permissions using the chmod command:
Bash
chmod +x vst-install.sh
Step 5: Run the Vesta CP Installation Script
Now, execute the script. For a standard installation with recommended packages (Apache, Nginx as a proxy, PHP, MariaDB, Postfix, Dovecot, etc.), use the following command:
Bash
./vst-install.sh
For advanced users who want more control over the installed components, you can explore custom installation options using the --force flag and specific arguments. Refer to the official Vesta CP documentation for details.
(Keywords: run Vesta CP installer, automatic Vesta CP installation)
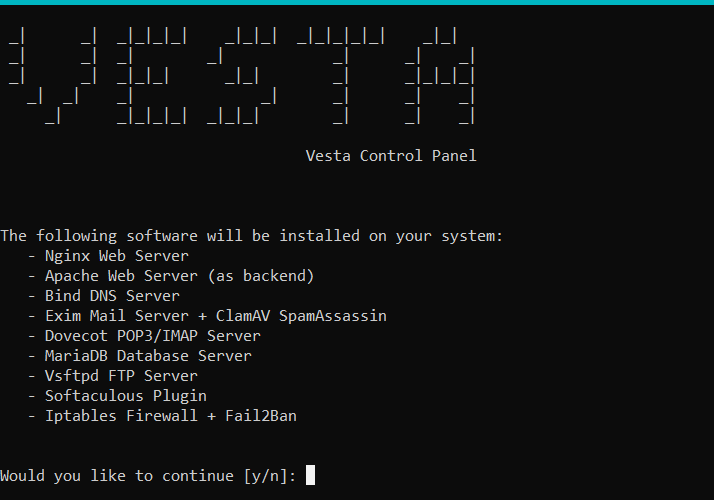
Step 6: Follow the Prompts
The installation script will guide you through a series of prompts. You’ll need to provide:
- Your Email Address: This is used for administrative notifications. Ensure you provide a valid email.
- Your Server’s Hostname: Verify the detected hostname is correct.
- Administrator Password: You’ll be asked to set a strong password for the Vesta CP
adminuser. Remember this password!
The script will then download and install the necessary software packages. This process can take anywhere from 15 to 45 minutes (or longer) depending on your server’s resources and internet speed. Do not interrupt the installation.
Step 7: Note Down the Installation Details
Once the installation is complete, the script will display crucial information, including:
- Vesta Control Panel URL: This is the web address you’ll use to access the Vesta CP interface (typically
http://your_server_ip:8083orhttps://your_server_ip:8083). - Administrator Username: The default username is
admin. - Administrator Password: The password you set during the installation.
Keep this information safe and secure.
(Keywords: Vesta CP login URL, Vesta CP admin username, Vesta CP admin password)
Step 8: Access the Vesta CP Web Interface
Open your preferred web browser and navigate to the URL provided by the installer (e.g., https://your_server_ip:8083). You might encounter a security warning due to the self-signed SSL certificate. Proceed by clicking “Advanced” and then “Proceed to [your_server_ip] (unsafe)”.
Step 9: Log In to Vesta CP
Enter the username (admin) and the password you created during the installation process. You’ll now have access to the powerful Vesta CP dashboard.
(Keywords: access Vesta CP, Vesta CP dashboard)
Post-Installation Security and Configuration
After successfully installing Vesta CP, it’s crucial to take some post-installation steps to enhance security and configure your server:
- Change the Default Port (Optional but Recommended): The default port
8083is well-known. Changing it to a less common port can reduce the risk of brute-force attacks. You can do this within the Vesta CP settings. - Configure Firewall Rules: Vesta CP usually configures
iptablesorfirewalld. Review these rules and ensure only necessary ports are open for security. - Install a Valid SSL Certificate: The self-signed certificate causes browser warnings. Consider obtaining and installing a trusted SSL certificate (like Let’s Encrypt) for secure access. Vesta CP has built-in support for Let’s Encrypt.
- Explore Vesta CP Features: Familiarize yourself with the various sections of the control panel to manage users, websites, databases, email, DNS, and more.
(Keywords: Vesta CP security, change Vesta CP port, configure firewall, install SSL certificate Vesta CP)
Troubleshooting Vesta CP Installation
If you encounter any issues during the Vesta CP installation, here are some troubleshooting tips:
- Check Installation Logs: Look for detailed error messages in the installation logs, usually located in
/var/log/vinstall.logor similar directories. - Verify Network Connectivity: Ensure your server has a stable internet connection throughout the installation.
- Check Firewall Settings (Server-Side): Make sure your server’s firewall isn’t blocking the necessary ports for downloading packages.
- Consult the Vesta CP Documentation and Community: The official Vesta CP documentation (https://vestacp.com/docs/) and community forums are excellent resources for finding solutions to common problems.
(Keywords: Vesta CP installation errors, Vesta CP troubleshooting)
Conclusion
Installing Vesta CP provides you with a powerful and user-friendly platform to manage your VPS or dedicated server effectively. By following these steps, you can quickly get your control panel up and running and start managing your online presence with ease. Remember to prioritize post-installation security measures to protect your server.