Search Results for: 化蝶去寻花啥意思单据-【✔️推荐KK37·CC✔️】-土右旗欧风丽苑二期-化蝶去寻花啥意思单据6fzkm-【✔️推荐KK37·CC✔️】-土右旗欧风丽苑二期o6gr-化蝶去寻花啥意思单据t86cx-土右旗欧风丽苑二期u1nb
How to Install CyberPanel on Your Server (Recommended OS, RAM, and More)
Category: CyberPanel Author: Servers9 Date: 2 months ago Comments: 0

If you’re looking for a fast, secure, and modern hosting control panel, CyberPanel is one of the best free options available. Powered by OpenLiteSpeed (or LiteSpeed Enterprise), it’s designed for high performance, security, and easy management.

In this guide, we’ll show you how to install CyberPanel properly on your server, including the recommended OS, RAM requirements, and important tips for a successful installation.


🚀 Why Choose CyberPanel?

  • Built on OpenLiteSpeed/LiteSpeed Web Server
  • Free SSL certificate issuance
  • Auto-install WordPress and LSCache
  • DNS, Email, FTP, and database management included
  • HTTP/3 and QUIC support
  • Lightweight and super fast compared to cPanel

🧩 System Requirements for CyberPanel

Before you install, make sure your server meets these requirements:

RequirementMinimumRecommended
Operating SystemUbuntu 18.04/20.04/22.04, AlmaLinux 8 or 9, CloudLinux 8AlmaLinux 8 or Ubuntu 22.04
CPU1 Core2+ Cores
RAM1 GB2+ GB (for OpenLiteSpeed), 4+ GB (for LiteSpeed Enterprise)
Storage10 GB40+ GB SSD preferred

Important:
For a smoother experience, use a clean server without any other control panels installed.

👉 If you need high-performance servers optimized for CyberPanel, you can check out Servers9 VPS and Dedicated Servers.


📋 How to Install CyberPanel (Step-by-Step)


✅ 1. Prepare Your Server

  • Fresh installation of AlmaLinux 8 or Ubuntu 22.04.
  • SSH access as root user.

Connect via SSH:

ssh root@your-server-ip

✅ 2. Update Your System

Update packages to avoid any conflicts:

For AlmaLinux / CentOS:

yum update -y

For Ubuntu:

apt update && apt upgrade -y

✅ 3. Install CyberPanel

Run the official installation script:

cd /usr/local/src
wget https://cyberpanel.net/install.sh
chmod +x install.sh
sh install.sh

✅ 4. Follow Installation Prompts

During installation, you will be asked:

  • Install CyberPanel? → Yes
  • Install Full Service (DNS, FTP, Email)? → Yes
  • Install Memcached, Redis? → Optional, recommended Yes
  • Set up Remote Database? → No (unless needed)
  • Choose Web Server:
    • OpenLiteSpeed (Free)
    • LiteSpeed Enterprise (License required)

If unsure, start with OpenLiteSpeed (you can upgrade later if needed).


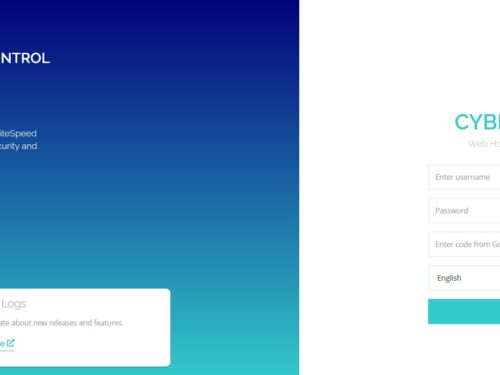
✅ 5. CyberPanel Admin Login

Once installed, you’ll get access details:

  • Panel URL: arduinoCopyEdithttps://your-server-ip:8090
  • Username: nginxCopyEditadmin
  • Password:
    (Generated or manually set during install)

Make sure port 8090 is allowed in your firewall settings!


⚙️ Post Installation Tips

  • Change the default admin password immediately
  • Install CSF Firewall for extra security
  • Enable auto-backups through CyberPanel dashboard
  • Secure your server with SSH key authentication

🚀 Need High-Performance VPS or Dedicated Servers for CyberPanel?

For the best CyberPanel experience, you need reliable, fast servers.

👉 Check out Servers9 high-performance VPS and Dedicated Servers
Optimized for CyberPanel hosting, SSD-powered, and with full root access!


CyberPanel is a game-changer if you want speed, security, and simplicity without paying high license fees like cPanel.
By following the above steps and starting with a clean, strong server, you’ll have a modern, optimized hosting environment ready in just minutes!


Common Mistakes When Setting Up CyberPanel API Access with WISECP/WHMCS (And How to Fix Them)
Category: CyberPanel,Troubleshooting Author: Servers9 Date: 2 months ago Comments: 0

If you’re trying to automate hosting account creation between WISECP or WHMCS and CyberPanel using API integration, you might run into errors that can seem confusing at first.

In this guide, we’ll go through the most common mistakes users make during CyberPanel API setup with WISECP or WHMCS, why these errors happen, and exactly how you can fix them.


⚙️ What Is WISECP/WHMCS + CyberPanel API Integration?

When correctly configured, WISECP or WHMCS can:

  • Automatically create hosting accounts on CyberPanel
  • Suspend, unsuspend, terminate accounts
  • Manage packages and SSL certificates
  • Handle customer automation without manual panel access

But a few small missteps can cause connection errors or account creation failures.


❗ Common Errors and How to Fix Them


1. Forbidden Characters in Admin Password

Error Example:

Data supplied is not accepted, following characters are not allowed in the input ` $ & ( ) [ ] { } ; : ‘ < >.

Cause:

  • Your CyberPanel admin password contains forbidden characters like $, &, {}, ;, :.

Fix:

  • Reset your CyberPanel Admin password to something safer without special characters.
  • Example: SecurePass123@

2. Websites Matching Query Does Not Exist

Error Example:

Websites matching query does not exist.

Cause:

  • The domain name you’re trying to operate on doesn’t exist yet in CyberPanel.
  • Or trying to suspend/delete before creation.

Fix:

  • Always create the hosting account first before issuing suspend/delete commands.
  • Double-check domain spelling (example.com, not example.com/).

3. Incorrect Package Name

Problem:

  • The package name you input into WISECP/WHMCS does not match exactly with the one created inside CyberPanel.

Fix:

  • In CyberPanel, create packages under Packages → Create Package.
  • Then use the exact same name in your billing panel’s product settings.

Important: It’s case-sensitive!


4. Missing Website Limit or Incorrect Settings

Problem:

  • Some API requests failed because website limit or resource limit fields were left empty.

Fix:

  • Set realistic values for:
    • Website Limit (1, 5, 10, etc.)
    • Disk Space Limit
    • Bandwidth Limit
  • Even if CyberPanel allows unlimited, WISECP/WHMCS needs a numerical value for API to validate.

5. Port and Firewall Blocking API Access

Problem:

  • API requests timeout because port 8090 (CyberPanel’s default API port) is closed or blocked by firewall.

Fix:

  • Allow port 8090 through your server firewall (CSF or native firewall):
csf -a client-ip
csf -a server-ip
  • Ensure CyberPanel is reachable via https://yourserverip:8090.

🔥 Summary Table: Quick Fixes

ProblemFix
Forbidden characters in passwordUse simple alphanumeric admin passwords
Domain doesn’t existCreate the domain first before operating
Wrong package nameMatch CyberPanel package exactly
Missing website limitsSet values for limits (Disk, Bandwidth, Website count)
Firewall blockingOpen CyberPanel ports for API access

🛠️ Best Practices for Smooth WISECP/WHMCS + CyberPanel Integration

  • ✅ Create clear packages inside CyberPanel first
  • ✅ Use clean admin passwords (no dangerous symbols)
  • ✅ Always fill resource limits in billing panel product configuration
  • ✅ Double-check domain spelling before triggering actions
  • ✅ Allow CyberPanel API ports in your firewall
  • ✅ Test API connection under Server Settings in WISECP or WHMCS

🚀 Need High Performance Servers for CyberPanel?

👉 Checkout our Cloud VPS plans in almost every region globally and get free expert help on:

  • Setting up CyberPanel API integration properly
  • Create safe, production-ready server templates
  • Automate your hosting business securely and reliably!

Now your WISECP/WHMCS + CyberPanel integration should run smoothly and error-free!


How to Fix Database Collation Conflicts in WordPress
Category: WordPress Author: Servers9 Date: 2 months ago Comments: 0

Have you ever run into WordPress errors like:

WordPress database error: Collation conflict: utf8mb4_general_ci vs utf8mb4_unicode_ci

Or experienced weird sorting behavior, broken search, or plugin malfunctions?

These are signs of a collation conflict in your WordPress database. In this guide, we’ll walk you through how to identify and fix collation conflicts to ensure your site runs smoothly and consistently.


🧠 What Is a Collation?

A collation determines how text is compared and sorted in your database.

Examples:

  • utf8mb4_general_ci
  • utf8mb4_unicode_ci
  • latin1_swedish_ci

Even though two fields may use the same character set (e.g., utf8mb4), using different collations can cause MySQL to fail comparisons or JOINs, leading to errors or unexpected results.


❗ Common Symptoms of Collation Conflicts

  • WordPress database errors in logs or frontend
  • Search or sorting not working properly
  • Plugin errors after migration
  • Admin area misbehavior (especially with forms or filters)
  • Error during WP CLI commands or multisite sync

🔍 Step 1: Detect Collation Conflicts

Option 1: Use phpMyAdmin

  1. Open your database
  2. Click “Structure” on each table
  3. Check the Collation column — look for mixed values like:
    • utf8mb4_unicode_ci
    • utf8mb4_general_ci
    • latin1_swedish_ci

Option 2: Use SQL Query

Run this in phpMyAdmin or MySQL CLI:

SELECT TABLE_NAME, COLUMN_NAME, CHARACTER_SET_NAME, COLLATION_NAME
FROM information_schema.columns
WHERE table_schema = 'your_database_name';

This lists all columns and their collations — look for mismatches.


🔧 Step 2: Choose a Standard Collation

For modern WordPress sites, it’s recommended to use:

nginxCopyEditutf8mb4_unicode_ci

Why?

  • It supports emojis and multilingual characters
  • It’s WordPress’s default for years now
  • It’s more accurate in sorting than _general_ci

🔄 Step 3: Convert Tables and Columns to a Single Collation

Use phpMyAdmin or run the following SQL for each table:

ALTER TABLE wp_posts CONVERT TO CHARACTER SET utf8mb4 COLLATE utf8mb4_unicode_ci;
ALTER TABLE wp_comments CONVERT TO CHARACTER SET utf8mb4 COLLATE utf8mb4_unicode_ci;
ALTER TABLE wp_options CONVERT TO CHARACTER SET utf8mb4 COLLATE utf8mb4_unicode_ci;

Repeat for any other tables with mixed collations.

To convert all tables, you can generate a script or use a plugin like WP-DBManager.


⚙️ Step 4: Update wp-config.php (If Needed)

Ensure your site is also telling WordPress to use the correct charset and collation:

define('DB_CHARSET', 'utf8mb4');
define('DB_COLLATE', '');

If you leave DB_COLLATE empty, WordPress will use your database default (which should now be uniform).


🧪 Optional: Check WordPress Database Structure

Use WP-CLI to compare your database to the expected structure:

wp db check
wp db optimize

Or, for WooCommerce users:

wp wc tool run verify-database --user=admin

✅ Summary: Fixing Collation Conflicts in WordPress

TaskAction
Detect collationsUse SQL query or phpMyAdmin
Choose a collationUse utf8mb4_unicode_ci
Convert tablesRun ALTER TABLE per table
wp-config.phpEnsure charset is utf8mb4, collation is blank
Prevent future issuesStandardize collation during export/import

🚀 Need Help Fixing Collation Issues?

Not sure where the conflicts are or worried about breaking your site?

👉 Let Servers9 fix it for you
We’ll scan your database, fix collation mismatches, and optimize your tables safely.


How to Fix WordPress Charset Issues After Migration (Strange Symbols, Broken Characters)
Category: Troubleshooting,WordPress Author: Servers9 Date: 2 months ago Comments: 0

After migrating your WordPress site, are you seeing weird characters like ’, é, Â, or instead of normal punctuation or language-specific letters?

These are signs of a character set (charset) mismatch, usually caused during the database export/import process. But the good news is — it’s fixable!

In this guide, you’ll learn why it happens and how to fix charset issues in WordPress after migration.


🧠 What Causes Charset Issues in WordPress?

When migrating a WordPress site between servers (especially with different MySQL versions), you may face:

  • Wrong character encoding in the database
  • Collation differences (latin1 vs utf8mb4)
  • Incorrect charset in wp-config.php
  • Broken data due to a bad import process

🧪 Symptoms You Might Notice

  • Apostrophes appear as ’ or &rsquo;
  • Foreign language characters appear broken
  • Emojis disappear or render as question marks
  • Posts and pages display gibberish symbols

✅ Step-by-Step: How to Fix Charset Problems in WordPress


🔹 Step 1: Check Your wp-config.php Charset

Login to your server and open:

nano /path-to-wordpress/wp-config.php

Make sure these lines look like:

define('DB_CHARSET', 'utf8mb4');
define('DB_COLLATE', '');

If it’s set to latin1, change it to utf8mb4.


🔹 Step 2: Check Database Table Charset

Use phpMyAdmin or CLI to inspect the table charset:

In phpMyAdmin:

  1. Select your database
  2. Click on any table
  3. Look at the Collation column

You’ll likely see a mix of:

  • latin1_swedish_ci
  • utf8_general_ci
  • utf8mb4_unicode_ci

For full compatibility, all should be utf8mb4_unicode_ci (or similar).


If your tables are still latin1, you can convert them.

In phpMyAdmin, run this SQL for each table:

ALTER TABLE wp_posts CONVERT TO CHARACTER SET utf8mb4 COLLATE utf8mb4_unicode_ci;

Repeat for:

  • wp_comments
  • wp_options
  • wp_users
  • Or use a script to apply this to all tables

Tip: Always backup your database before running ALTER queries.


🔹 Step 4: Use WP-CLI to Search & Replace Garbage Characters

If broken characters were already stored (e.g., during migration), use WP-CLI:

wp search-replace 'é' 'é' --all-tables
wp search-replace '’' '’' --all-tables

This corrects corrupted characters stored during bad encoding.


🔹 Step 5: Fix Your Export Process for Future Migrations

If you’re still migrating:

Use this when exporting from MySQL 8+:

mysqldump --default-character-set=utf8mb4 --skip-comments --column-statistics=0 --set-gtid-purged=OFF --no-tablespaces -u root -p your_db > your_backup.sql

Then import using:

mysql --default-character-set=utf8mb4 -u user -p your_db < your_backup.sql

This avoids collation/charset mismatch errors.


✅ Bonus Tips

  • ✅ Avoid using latin1 on any modern WordPress site
  • ✅ Use utf8mb4 to fully support emojis, multilingual content, and special symbols
  • ✅ Tools like Better Search Replace or WP Migrate DB can help detect charset issues
  • ✅ Use phpMyAdmin > Export > UTF8MB4 when exporting via the UI

📌 Summary: Fixing WordPress Charset Issues After Migration

ProblemFix
Weird characters (é, ’)Set utf8mb4 in wp-config.php
Collation mismatch in tablesConvert tables to utf8mb4_unicode_ci
Data already corruptedUse WP-CLI search-replace to fix
Future migrationsAlways export/import with --default-character-set=utf8mb4

⚡ Need Help Fixing a Broken WordPress Migration?

👉 Open a support request with Servers9
We’ll help you clean up corrupted content, restore the correct charset, and safely migrate your database without data loss.


How to Fix Character Set Errors When Importing Databases (MySQL & cPanel Guide)
Category: cPanel,Troubleshooting Author: Servers9 Date: 2 months ago Comments: 0

Importing a MySQL database but seeing strange symbols like ’, é, or error messages related to character sets or collations? You’re likely dealing with a character set mismatch — a common issue when databases are moved between servers or exported incorrectly.

In this guide, we’ll walk you through why it happens and how to fix character set errors when importing databases, especially within cPanel or phpMyAdmin.


❓ Common Errors You Might See

  • Garbage characters in content (e.g., WordPress posts showing � or weird symbols)
  • Errors like: sqlCopyEditERROR 1115 (42000): Unknown character set: 'utf8mb4' or pgsqlCopyEditERROR 1253 (42000): COLLATION 'utf8mb4_unicode_ci' is not valid for CHARACTER SET 'latin1'

🧠 Why This Happens

This usually occurs when:

  • A database was exported using one character set (e.g., utf8mb4)
  • But it’s being imported as another (e.g., latin1)
  • Or your MySQL server version doesn’t support certain charsets/collations

✅ Step-by-Step: How to Fix Character Set Import Issues


🔹 Step 1: Check Character Set in SQL Dump

Open your .sql file and look for lines like:

/*!40101 SET NAMES utf8mb4 */;

Or:

DEFAULT CHARSET=latin1

If it says latin1, but your content contains UTF-8 (e.g., emojis or non-English text), you’ll likely run into issues.


🔹 Step 2: Fix Using Text Replacement (If Misdeclared)

If the data is actually utf8mb4 but the file says latin1, fix it by replacing:

sed -i 's/CHARSET=latin1/CHARSET=utf8mb4/g' your_backup.sql
sed -i 's/SET NAMES latin1/SET NAMES utf8mb4/g' your_backup.sql

Alternatively, edit the .sql file in a text editor like VS Code or Notepad++.


🔹 Step 3: Specify the Correct Charset on Import (via CLI)

When importing via the command line, explicitly set the correct character set:

mysql --default-character-set=utf8mb4 -u username -p database_name < your_backup.sql

✅ This ensures MySQL doesn’t assume the wrong encoding.


🔹 Step 4: Fix phpMyAdmin Upload Charset (Optional)

If using phpMyAdmin, before you import:

  • Choose the correct collation (e.g., utf8mb4_general_ci) in the import page.
  • Then upload the .sql file

💡 Bonus: How to Export Databases Correctly (Prevent Future Issues)

When exporting from mysqldump, always define a character set:

mysqldump --default-character-set=utf8mb4 --skip-comments --set-gtid-purged=OFF --column-statistics=0 -u root -p database_name > clean_backup.sql

This keeps character set declarations consistent and import-safe.


🧪 Optional: Force Charset in WordPress wp-config.php

If you’re restoring a WordPress site and seeing strange characters:

define('DB_CHARSET', 'utf8mb4');
define('DB_COLLATE', '');

Add or confirm these in wp-config.php


🛑 Still Seeing Weird Symbols?

  • The data may have already been stored incorrectly.
  • In this case, a search & replace tool like WP-CLI’s search-replace can help.
  • Or restore the data again using the proper charset and collation from the start.

✅ Summary: Fixing Charset Import Errors

ProblemSolution
Unknown character set errorReplace with a known one (e.g., utf8mb4)
Weird symbols after importForce charset on import
latin1 in dump but content is UTF-8Replace all latin1 with utf8mb4 before import
Using phpMyAdminChoose correct charset in UI

⚡ Need Help With Character Set Issues or Corrupted Imports?

👉 Servers9 offers professional database restoration and cleanup
We can recover content, fix charset mismatches, and safely import even damaged .sql files.


How to Fix “Unknown Collation: utf8mb4_0900_ai_ci” Error When Restoring a MySQL Database in cPanel
Category: cPanel,Troubleshooting Author: Servers9 Date: 2 months ago Comments: 0

If you’re trying to restore a MySQL database backup in cPanel and encounter the error:

ERROR 1273 (HY000) at line XXXX: Unknown collation: 'utf8mb4_0900_ai_ci'

You’re not alone. This is a common issue when moving a database from a newer MySQL version (like 8.0+) to a server running an older version of MySQL or MariaDB (e.g., 5.7 or 10.3).

But don’t worry — this can be fixed easily with a few quick steps.


🧠 What Does This Error Mean?

The collation utf8mb4_0900_ai_ci was introduced in MySQL 8.0, and it’s not recognized by older MySQL or MariaDB versions, which is what most shared hosting and cPanel environments still use.

When the SQL dump file references this collation, the target server doesn’t know what to do with it — and throws this error.


✅ How to Fix the Error (Step-by-Step)

🔹 Step 1: Locate the Backup File

You likely have a .sql file you’re trying to import. If it’s zipped, unzip it first.


🔹 Step 2: Replace the Unsupported Collation

Use a text editor (or command line) to find and replace utf8mb4_0900_ai_ci with a supported collation like utf8mb4_unicode_ci.

Option A: Use Command Line (Recommended for large files)

sed -i 's/utf8mb4_0900_ai_ci/utf8mb4_unicode_ci/g' your_backup.sql

Option B: Use a Text Editor

  • Open the .sql file in a code editor (e.g., Notepad++, VS Code)
  • Find: utf8mb4_0900_ai_ci
  • Replace with: utf8mb4_unicode_ci
  • Save the file

🔹 Step 3: Re-Import the Fixed SQL File

Now that the unsupported collation is removed, you can import the updated .sql file via:

✅ phpMyAdmin (cPanel)

  1. Login to cPanel
  2. Go to phpMyAdmin
  3. Select the target database
  4. Click Import
  5. Upload the updated .sql file

✅ Terminal/SSH (Advanced)

mysql -u cpaneluser -p database_name < your_backup.sql

💡 Optional: Modify Future Backups to Avoid This Error

When creating backups from a MySQL 8.0+ server, use this mysqldump command to avoid version-specific collations:

mysqldump --default-character-set=utf8mb4 --set-gtid-purged=OFF --column-statistics=0 --skip-tz-utc --no-tablespaces -u root -p your_db > your_db.sql

This forces the dump to use older-compatible character sets and avoids collation conflicts.


🛑 Don’t Want to Downgrade? Upgrade Instead (Advanced Users)

If you have WHM or full root access, you could consider upgrading your server to MySQL 8.0+ — but beware:

  • Not all cPanel environments support it smoothly yet
  • Backup your databases and config before upgrading

For shared hosting users, the file-edit method is the safest route.


🧩 Summary

ProblemSolution
Unknown collation: utf8mb4_0900_ai_ciReplace it with utf8mb4_unicode_ci in the SQL dump
Future backups using MySQL 8+Add --default-character-set=utf8mb4 to mysqldump
Using cPanel?Edit the .sql before importing via phpMyAdmin

⚡ Need Help with MySQL or cPanel Migration?

Want your databases restored without errors or downtime?

👉 Open a support ticket with Servers9
Our team can help you with:

  • Database import/export
  • Character set conversions
  • WordPress migrations
  • cPanel to cPanel transfers

1 2 3 10